Quick Start: Start a sale
Selina has just finished piercing the client. We have previously started the walk-in service, now it’s time to collect payment from the client.
- From the Today Dashboard select the service you want to complete.
-
Click the Sale action on the toolbar, or double click the Service to open it if you need to modify it and click the Sale action in the Service Detail View.
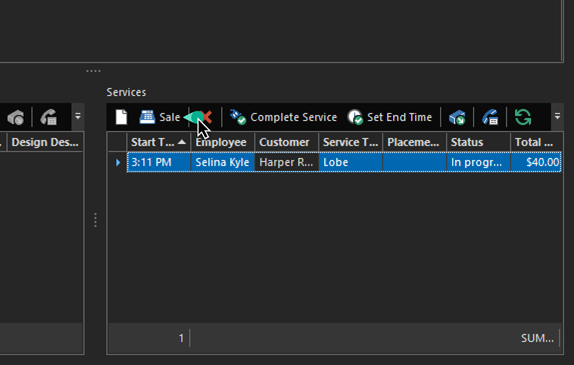
The Sale action will add this service to a sale and open the Sale Detail View. This is the point-of-sale screen for REV23 Desktop where we can add products and services, take payments, etc.. If this service was already added to a sale, it will open that existing sale rather than create a new one.
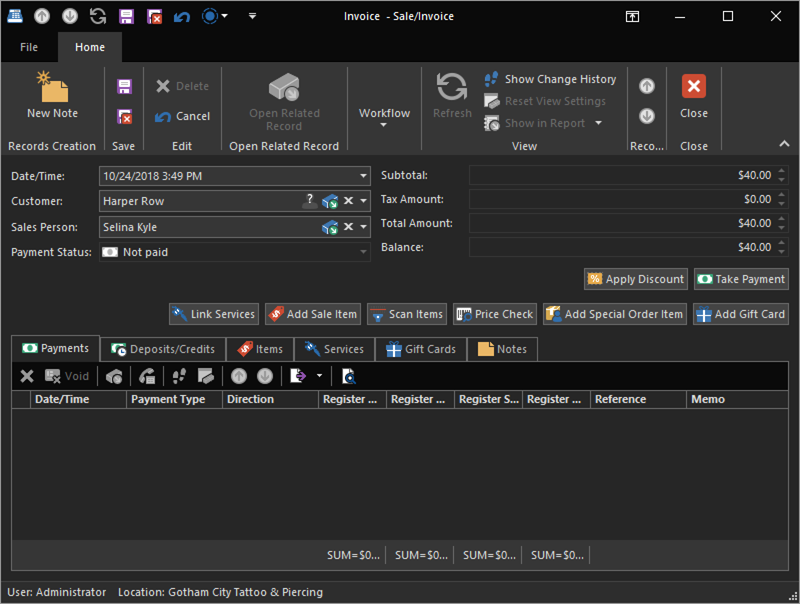
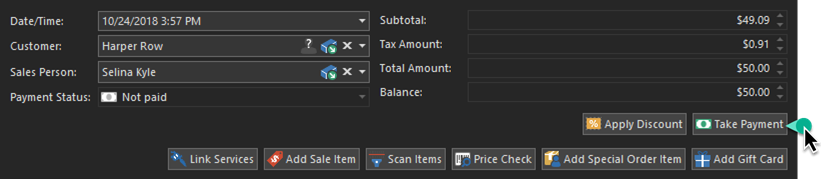
You should notice the Subtotal, Tax Amount, Total Amount and Balance editors have already added this service and you can find it in the Services tab. So far, the client owes $40.00. But she’d like to add some piercing aftercare.
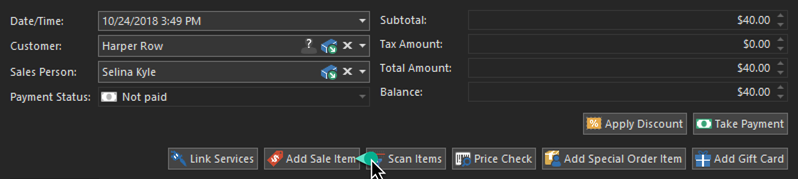
Add a sale item
-
Click the Add Sale Item action.
-
In the Inventory Item editor, we will select the piercing aftercare spray we created earlier, then click the OK button.
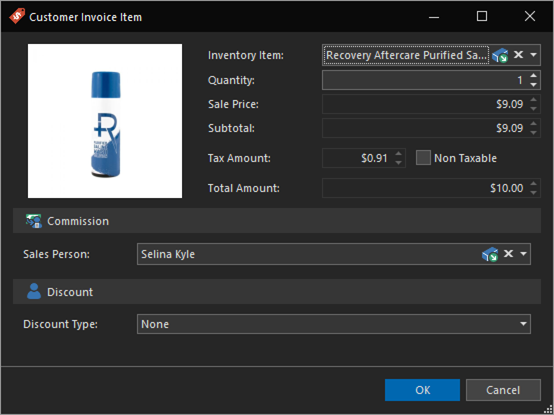
The item is added to the sale, and our totals have been updated. The client now owes
$50.00. -
The client has everything she needs and is ready to pay. Click the Take Payment action.
-
The client happens to have a crisp $50.00 bill in her purse and uses it (don’t worry, she tipped Selina back at her station)! So leave the pre-set Amount, which is the total due, and click the Cash tile.
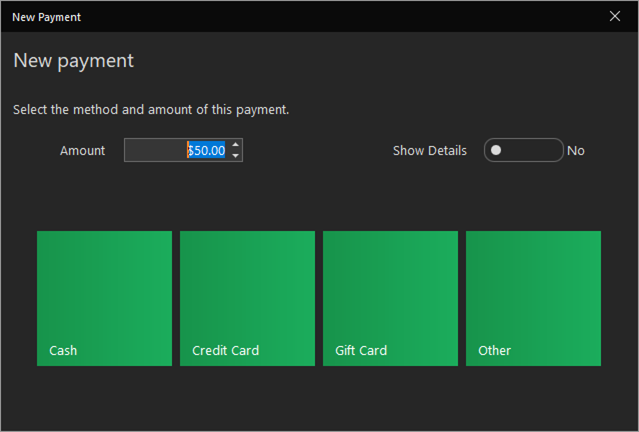
You can take a partial payment by altering the Amount in this window.
-
Once fully paid, you’ll be prompted to print the receipt and aftercare. You can add/remove the checkboxes from the tiles by clicking the tiles of what you want or don’t want to print. Then either click the Print or Skip tiles.
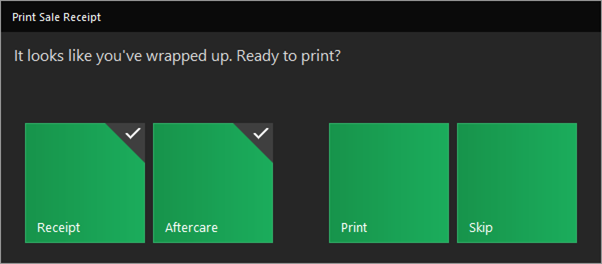
Hint: You can default these choices in Invoicing & Payment Options and Service Options. By setting your defaults to anything other than ‘Prompt,’ you will never see this screen, and everything should just print automatically, saving you some mouse clicks.
The service Status is now set to Paid.
At this point, you can just close the Service Detail View (it was already saved automatically once the sale was fully paid) or click Save & Close. Save & Close is just a good habit to get into and is one of the most common actions you’ll use.